
8 Tips For A Great Kayfun Build
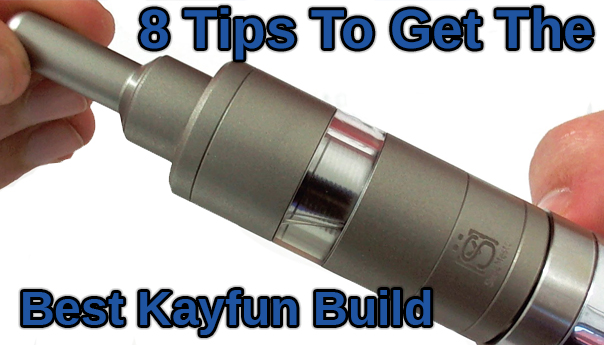
The Kayfun 3.1 changed the way we vape. The might be a bold statement, but in a short amount of time, it went from a boutique product to one of the top choices in rebuildable atomizers. Offering a killer combination of excellent flavor, good vapor production, solid construction, and an easy build, the Kayfun quickly inspired a plethora of copycats and clones and became a staple in almost every vaper’s arsenal.
Even though the Kayfun is considered significantly easier to build than the popular Genesis-style, Kayfun style atomizers can throw a few curves at the unsuspecting vaper. Just a few simple dos and don’ts will keep you ensconced in clouds.
(NOTES: The chimney consists of two parts: the upper and lower. The upper looks like an inverted funnel and threads onto the lower big. The entire chimney threads onto the deck. The deck is the top part of the base that you build a coil on. The juice channels are on either side of the deck, perpendicular to the coil set screws.)
1. KEEP THE CHANNEL CLEAR
You might have heard this one before, because it’s the most common issue. Too much wick can block the channels that lead form the juice tank to the inner chamber and impair wicking. This leads to dry hits and leaking, and no one wants that. Excess air pressure inside the tank has to go somewhere, and that somewhere usually shoots straight out of the air hole onto your mod and hands.
2. DON’T SKIMP OUT ON THE WICK THOUGH
This particular style of rba seems to live and die with proper wick length and placement. A wick that is too long interferes with juice flow and will cause a flood. However, a wick that’s too short will lead to dry hits. You’ll have to experiment a bit to get it perfect, but in general, you want to wick to just contact the deck.
3. PERFECT PLACEMENT IS ESSENTIAL
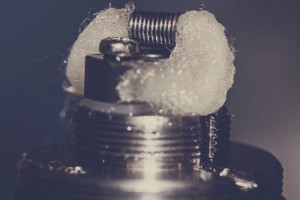 Whichever style of coil you choose to build, it works best if it’s built at an angle. That way, the end of the wick falls to the side of the juice channel. It’s really important to get this right. Here’s a good method:
• Build the coil at an angle, about negative 45 degrees from perpendicular to the post screws (think Northwest). This will allow the wick to spin along with the lower chimney as you thread it onto the deck so it stays out of the threads.
• Add some liquid to the entire wick and make sure it’s out of the channels.
• Thread the lower chimney (WITHOUT the uppoer chimney piece) gently onto the deck. The juice should help hold the wick in place.
• If some of the wick gets caught in the threads outside the chamber, just bite the bullet and do it all over again.
• Fire it and check for hot spots. If you see any small bit of the coil heat up before the rest, you’ve got a hot spot. Once it’s good, thread on the top chimney section.
5. NO, REALLY – CHECK FOR HOT SPOTS
It’s not enough to just dry fire and check for a uniform glow from the inside out. Saturate the wick and check for hot spots and hot legs. Any bit of the coil heating irregularly will cause nasty flavor.
6. GIVE HER SOME AIR
On a Kayfun-style atty, air flows from under the coil. If the coil is built too close (or resting on) the center air-hole, you’ll choke it, which can cause all kinds of trouble. Do yourself a favor and build your coil 1 or 2 mm above the air-hole.
7. FILL IT UP
Once you’ve set up the your coil it’s time to fill it up with that sweet e-liquid. There are two ways to fill a Kayfun, so here are both methods:
• The safest way is to simply use the filling screw on the bottom (or side) of the base. You’ll need a syringe or needle-nosed bottle but that one dollar investment can save you lots of money in leaked juice. Just turn the atty upside down, remove the fill hole screw, fill it up and replace the screw. While it’s still upside-down, it’s good to blow through the air hole gently to make sure the pathway is free of juice.
• The other way is the “flip” method. With the tank disassembled, thread all pieces together but the top-most cap. Fill the tank reservoir directly. Place the top cap on, just enough that the O-ring seats. Give it about 1/8 of a turn. Now place your thumb over the air hole, flip upside-down and thread it together quickly. While it’s still upside-down, blow gently through the air-hold to equalize pressure and get rid of any accumulated juice.
8. SUB-OHM-OH-NO
Sure, lots of people build sub-ohm coils on their Kayfun-style atomizers. but these devices are not designed to be fog machines; they’re designed for flavor and thick vapor. If you want to blow clouds, get yourself a Gennie. Most people find the best results around 1.5 ohms.
The Kayfun is a great device, plain and simple. Just remember these tips – keep the juice channels clear, perfect your wick length/placement, and keep your coil glowing evenly – and you’ll take your vaping experience to a whole new level.